

FFmpeg on Windows: Install, Test, and Reuse Commands
Install FFmpeg on Windows, read its command structure, test changes on short clips, and save commands that work.
https://www.youtube.com/watch?v=c3bT-VuVoUA
FFmpeg turns media files into other media files. A useful workflow needs four things:
- a working install;
- a clear command structure;
- short test runs; and
- a place to save commands that worked.
Install and verify
Get FFmpeg working before building commands.
Install FFmpeg on Windows
Use WinGet
Open PowerShell or Windows Terminal and run:
winget install "FFmpeg (Essentials Build)"The package comes from Gyan’s Windows builds. The essentials build covers common video, image-sequence, and audio work.
Open a new terminal after installation, then check both tools:
ffmpeg -hide_banner -version
ffprobe -hide_banner -version
A version response confirms that Windows can find the programs.
If WinGet cannot find that name, search the current package list:
winget search ffmpegKeep the portable option
FFmpeg publishes source code and links to Windows builds on its download page. The video uses Gyan’s portable ZIP build. The 2021 screen below shows the build choice; the current page can look different.
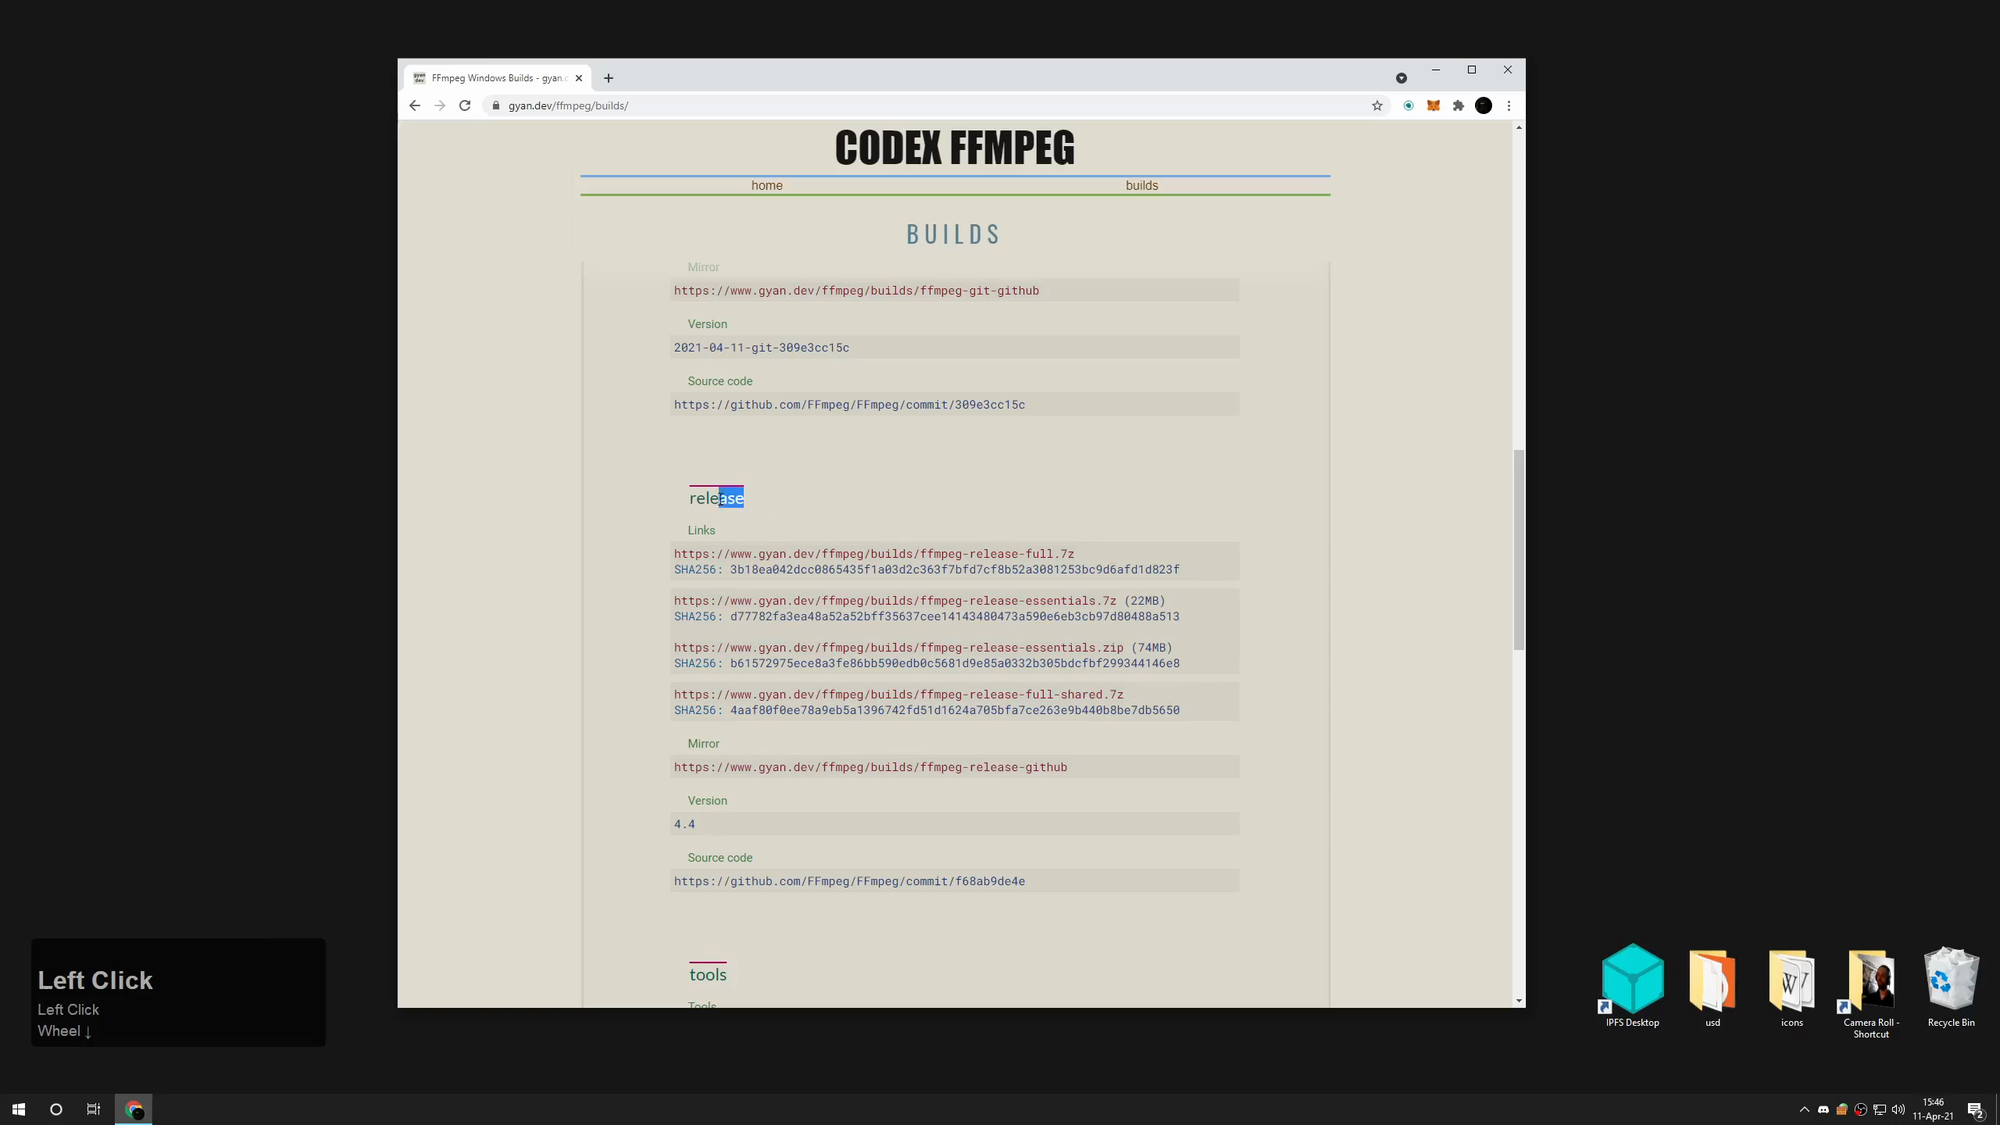
- Download the current release essentials ZIP.
- Extract it to a durable folder outside Downloads.
- Open the extracted
binfolder. It containsffmpeg.exe,ffplay.exe, andffprobe.exe. - Copy the full path to
bin. - Open Edit the system environment variables → Environment Variables → Path → Edit → New.
- Paste the
binpath and confirm the dialogs. - Open a new terminal and run
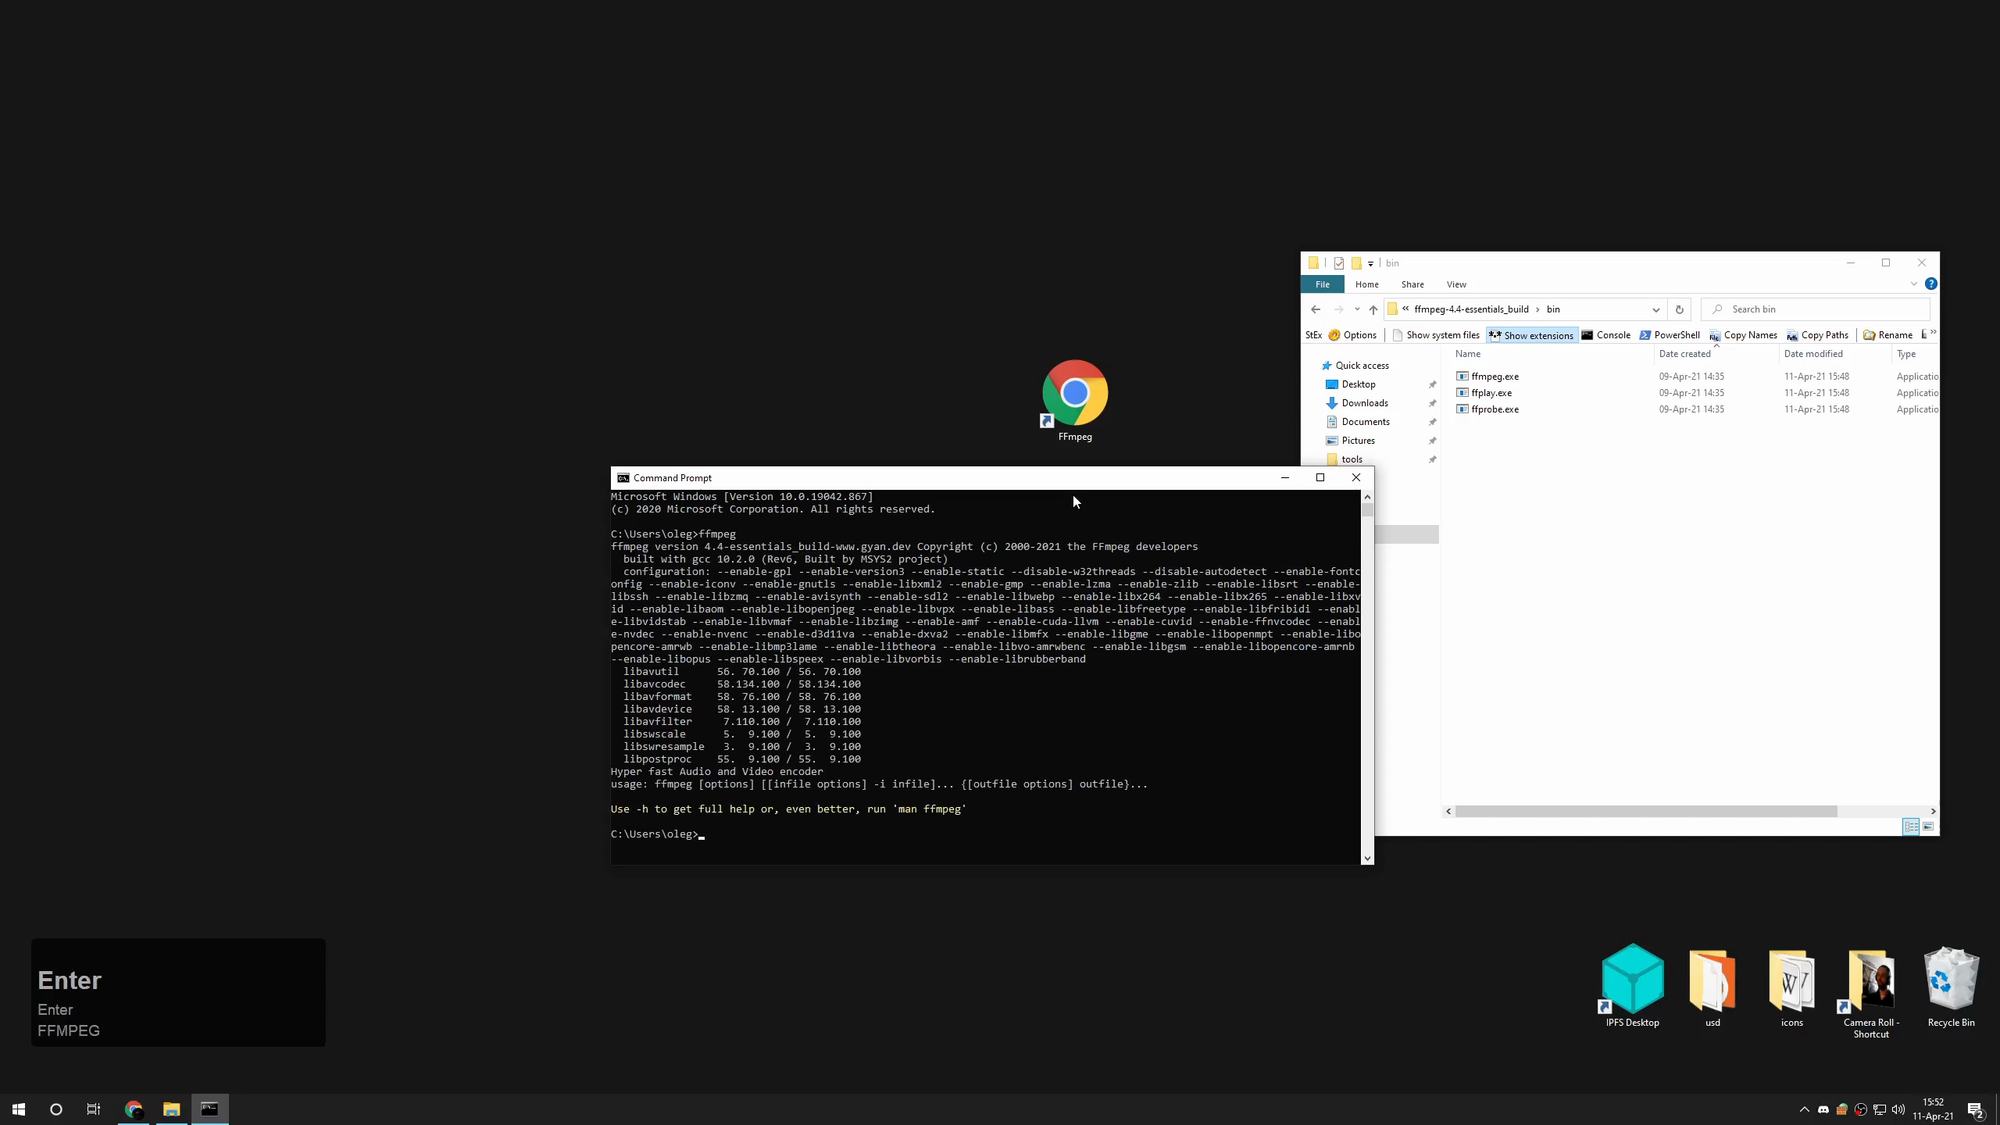
ffmpeg -hide_banner -version.
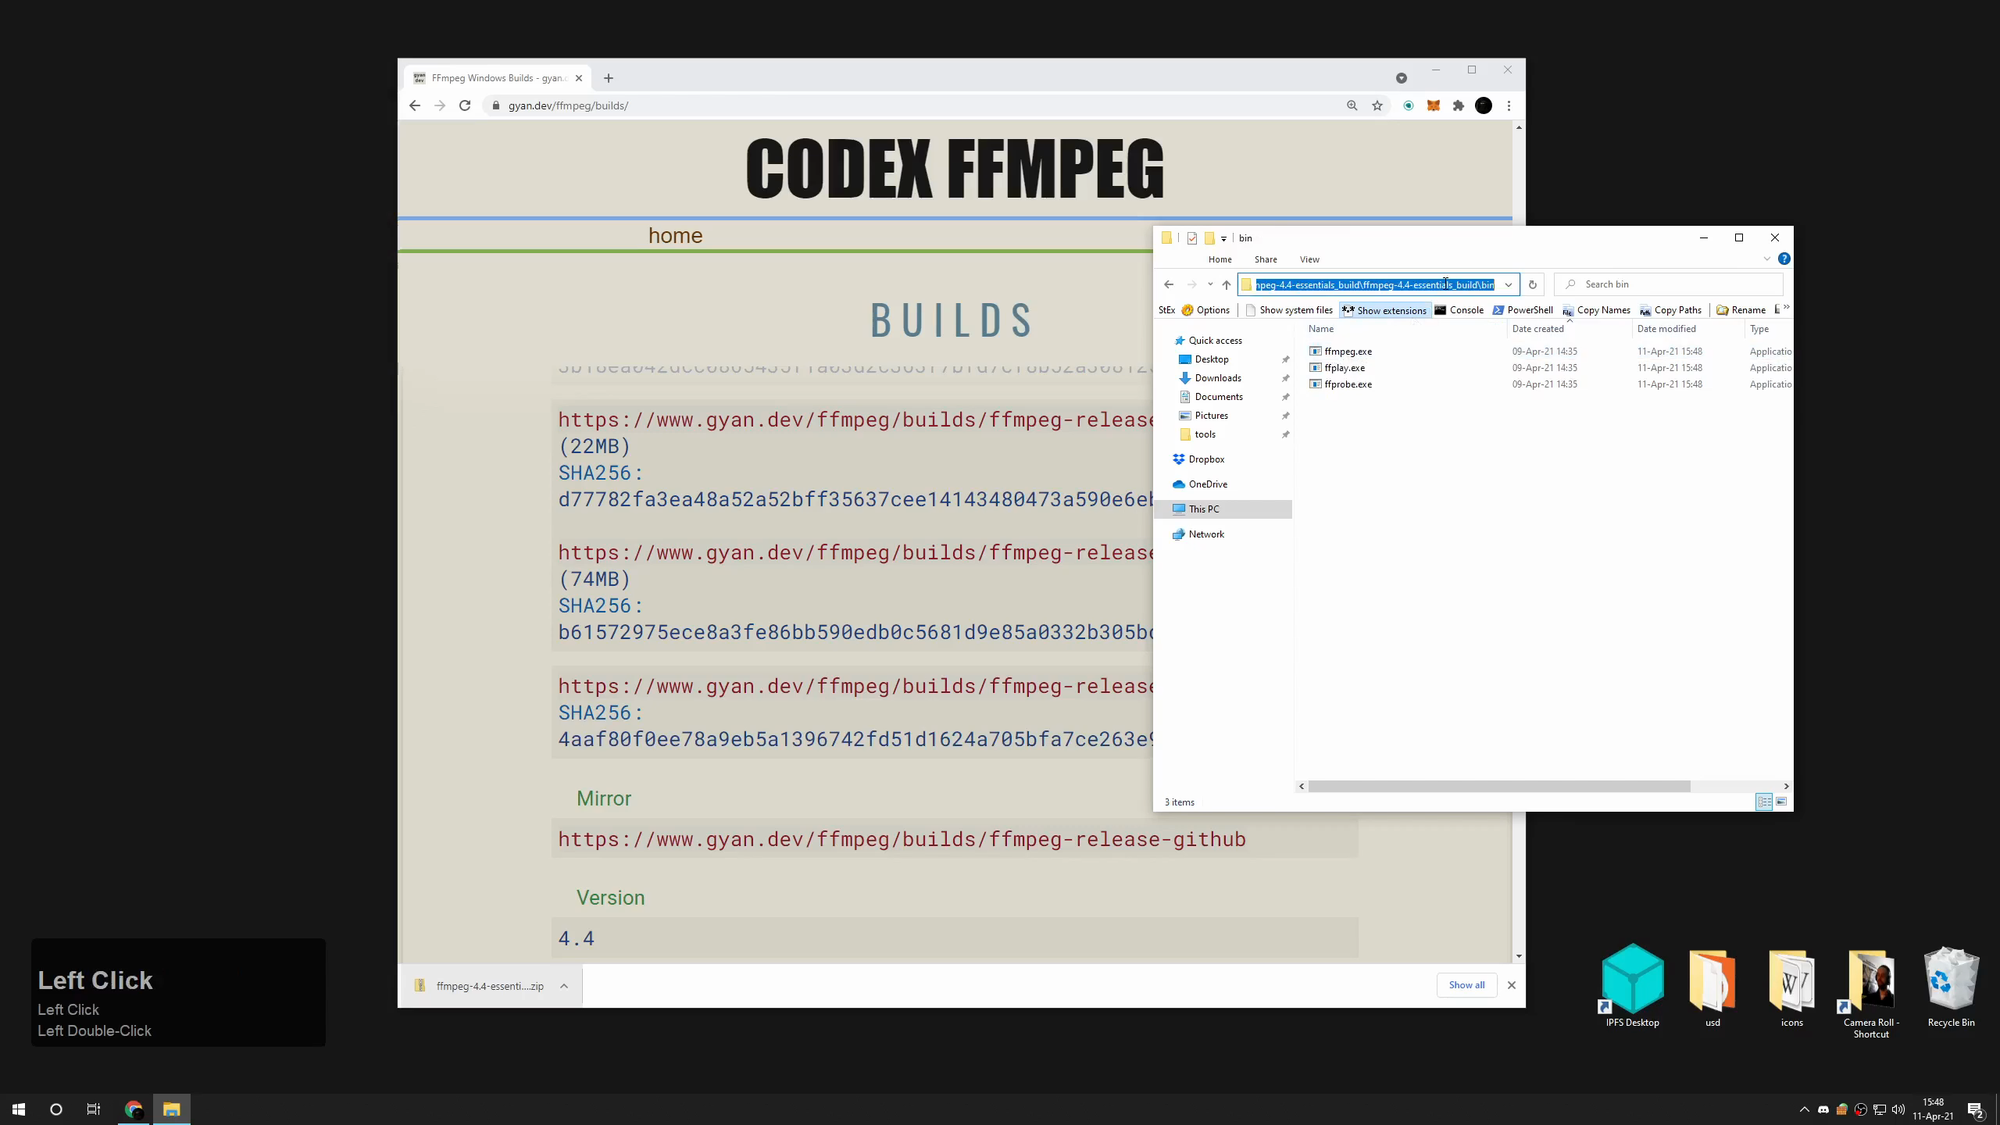
PATH is the Windows list of folders searched when you type a command. Adding bin lets you run FFmpeg from any project folder.
Open a new terminal after changing PATH. Existing terminals will not see the update.
Build a safe command
Read the structure, protect the source, and test a short clip.
Read a command from left to right
The basic structure is:
ffmpeg input_options -i input_file output_options output_fileffmpegstarts the program.-i input_filepoints to the source file.- Output options describe the new file.
- The final path names the output and helps select its container — the file structure represented by extensions such as
.mp4and.mov.
The smallest conversion is:
ffmpeg -n -i "input.mov" "output.mp4"FFmpeg chooses several settings automatically. This command makes a common H.264 delivery file explicit:
ffmpeg -n -i "input.mov" -c:v libx264 -crf 20 -preset medium -c:a aac -b:a 192k -pix_fmt yuv420p -movflags +faststart "output.mp4"-nstops if the output file already exists.-c:v libx264uses the H.264 video codec — the format used to compress and decode the video stream.-crf 20sets the Constant Rate Factor for x264. Lower values usually give higher quality and larger files. Range is 0 to 51.-preset mediumbalances encoding time and compression.-c:a aac -b:a 192kcreates AAC audio at 192 kbit/s.-pix_fmt yuv420psets a pixel layout accepted by common players and web services.-movflags +faststartmoves the MP4 index to the beginning so playback can start before the whole file downloads.
Protect the source and test first
Quote every Windows path that may contain spaces:
ffmpeg -n -i "C:\projects\client film\input.mov" "C:\projects\client film\output.mp4"Render ten seconds before processing a long file:
ffmpeg -n -i "input.mov" -t 10 -c:v libx264 -crf 20 -preset medium -c:a aac -b:a 192k -pix_fmt yuv420p "test-10s.mp4"Use -n while testing. Use -y only when replacing an existing output is intentional.
Keep useful commands
Reuse known-good commands and inspect AI-generated drafts.
Commands worth keeping
Make an H.264 MP4 at 1920 pixels wide
ffmpeg -n -i "input.mov" -vf "scale=1920:-2" -c:v libx264 -crf 20 -preset medium -c:a aac -b:a 192k -pix_fmt yuv420p -movflags +faststart "output-1920.mp4"-2 makes FFmpeg calculate an even height while preserving the source aspect ratio.
Remove audio without encoding the video again
ffmpeg -n -i "input.mp4" -map 0:v:0 -c:v copy -an "output-silent.mp4"-map 0:v:0 selects the first video stream. -c:v copy copies its compressed data. -an leaves audio out.
Turn a PNG sequence into a review movie
ffmpeg -n -framerate 24 -start_number 1 -i "render.%04d.png" -c:v libx264 -crf 18 -preset medium -pix_fmt yuv420p "preview.mp4"%04d matches four-digit frame numbers such as 0001, 0002, and 0003. Change -start_number and the padding to match the files.
Inspect a file before changing it
ffprobe -hide_banner "input.mov"FFprobe reports the container, streams, codecs, frame size, frame rate, and audio layout without changing the file.
Ask an AI assistant for a draft
An AI assistant is useful when the request states the input, output, limits, delivery target, and test method. Paste a prompt like this:
Write an FFmpeg command for Windows PowerShell.

Input: input_path_and_format
Output: output_path_and_format
Keep or change: properties_to_keep_or_change
Delivery target: delivery_target
Priority: priority

Explain every option.
Use -n and a new output filename.
Provide a second command that processes only the first 10 seconds.
Check the draft before using it:
- Quote all paths.
- Keep input and output filenames different.
- Identify which streams will be encoded and which will be copied.
- Run the ten-second test.
- Read the terminal output for warnings and errors.
- Check unfamiliar options in the FFmpeg command documentation.
- List the installed encoders or filters when a command fails:
ffmpeg -hide_banner -encoders
ffmpeg -hide_banner -filters
Build a reference
Save the reason, inputs, outputs, and fixes with every command.
Save commands with context
The original mind map is a visual library of commands collected around the 2021 video. Treat it as a historical reference and check each command before reuse.
A full preview of the original mind map is included below.
Download the original mind-map pack — PDF, text, and SimpleMind source
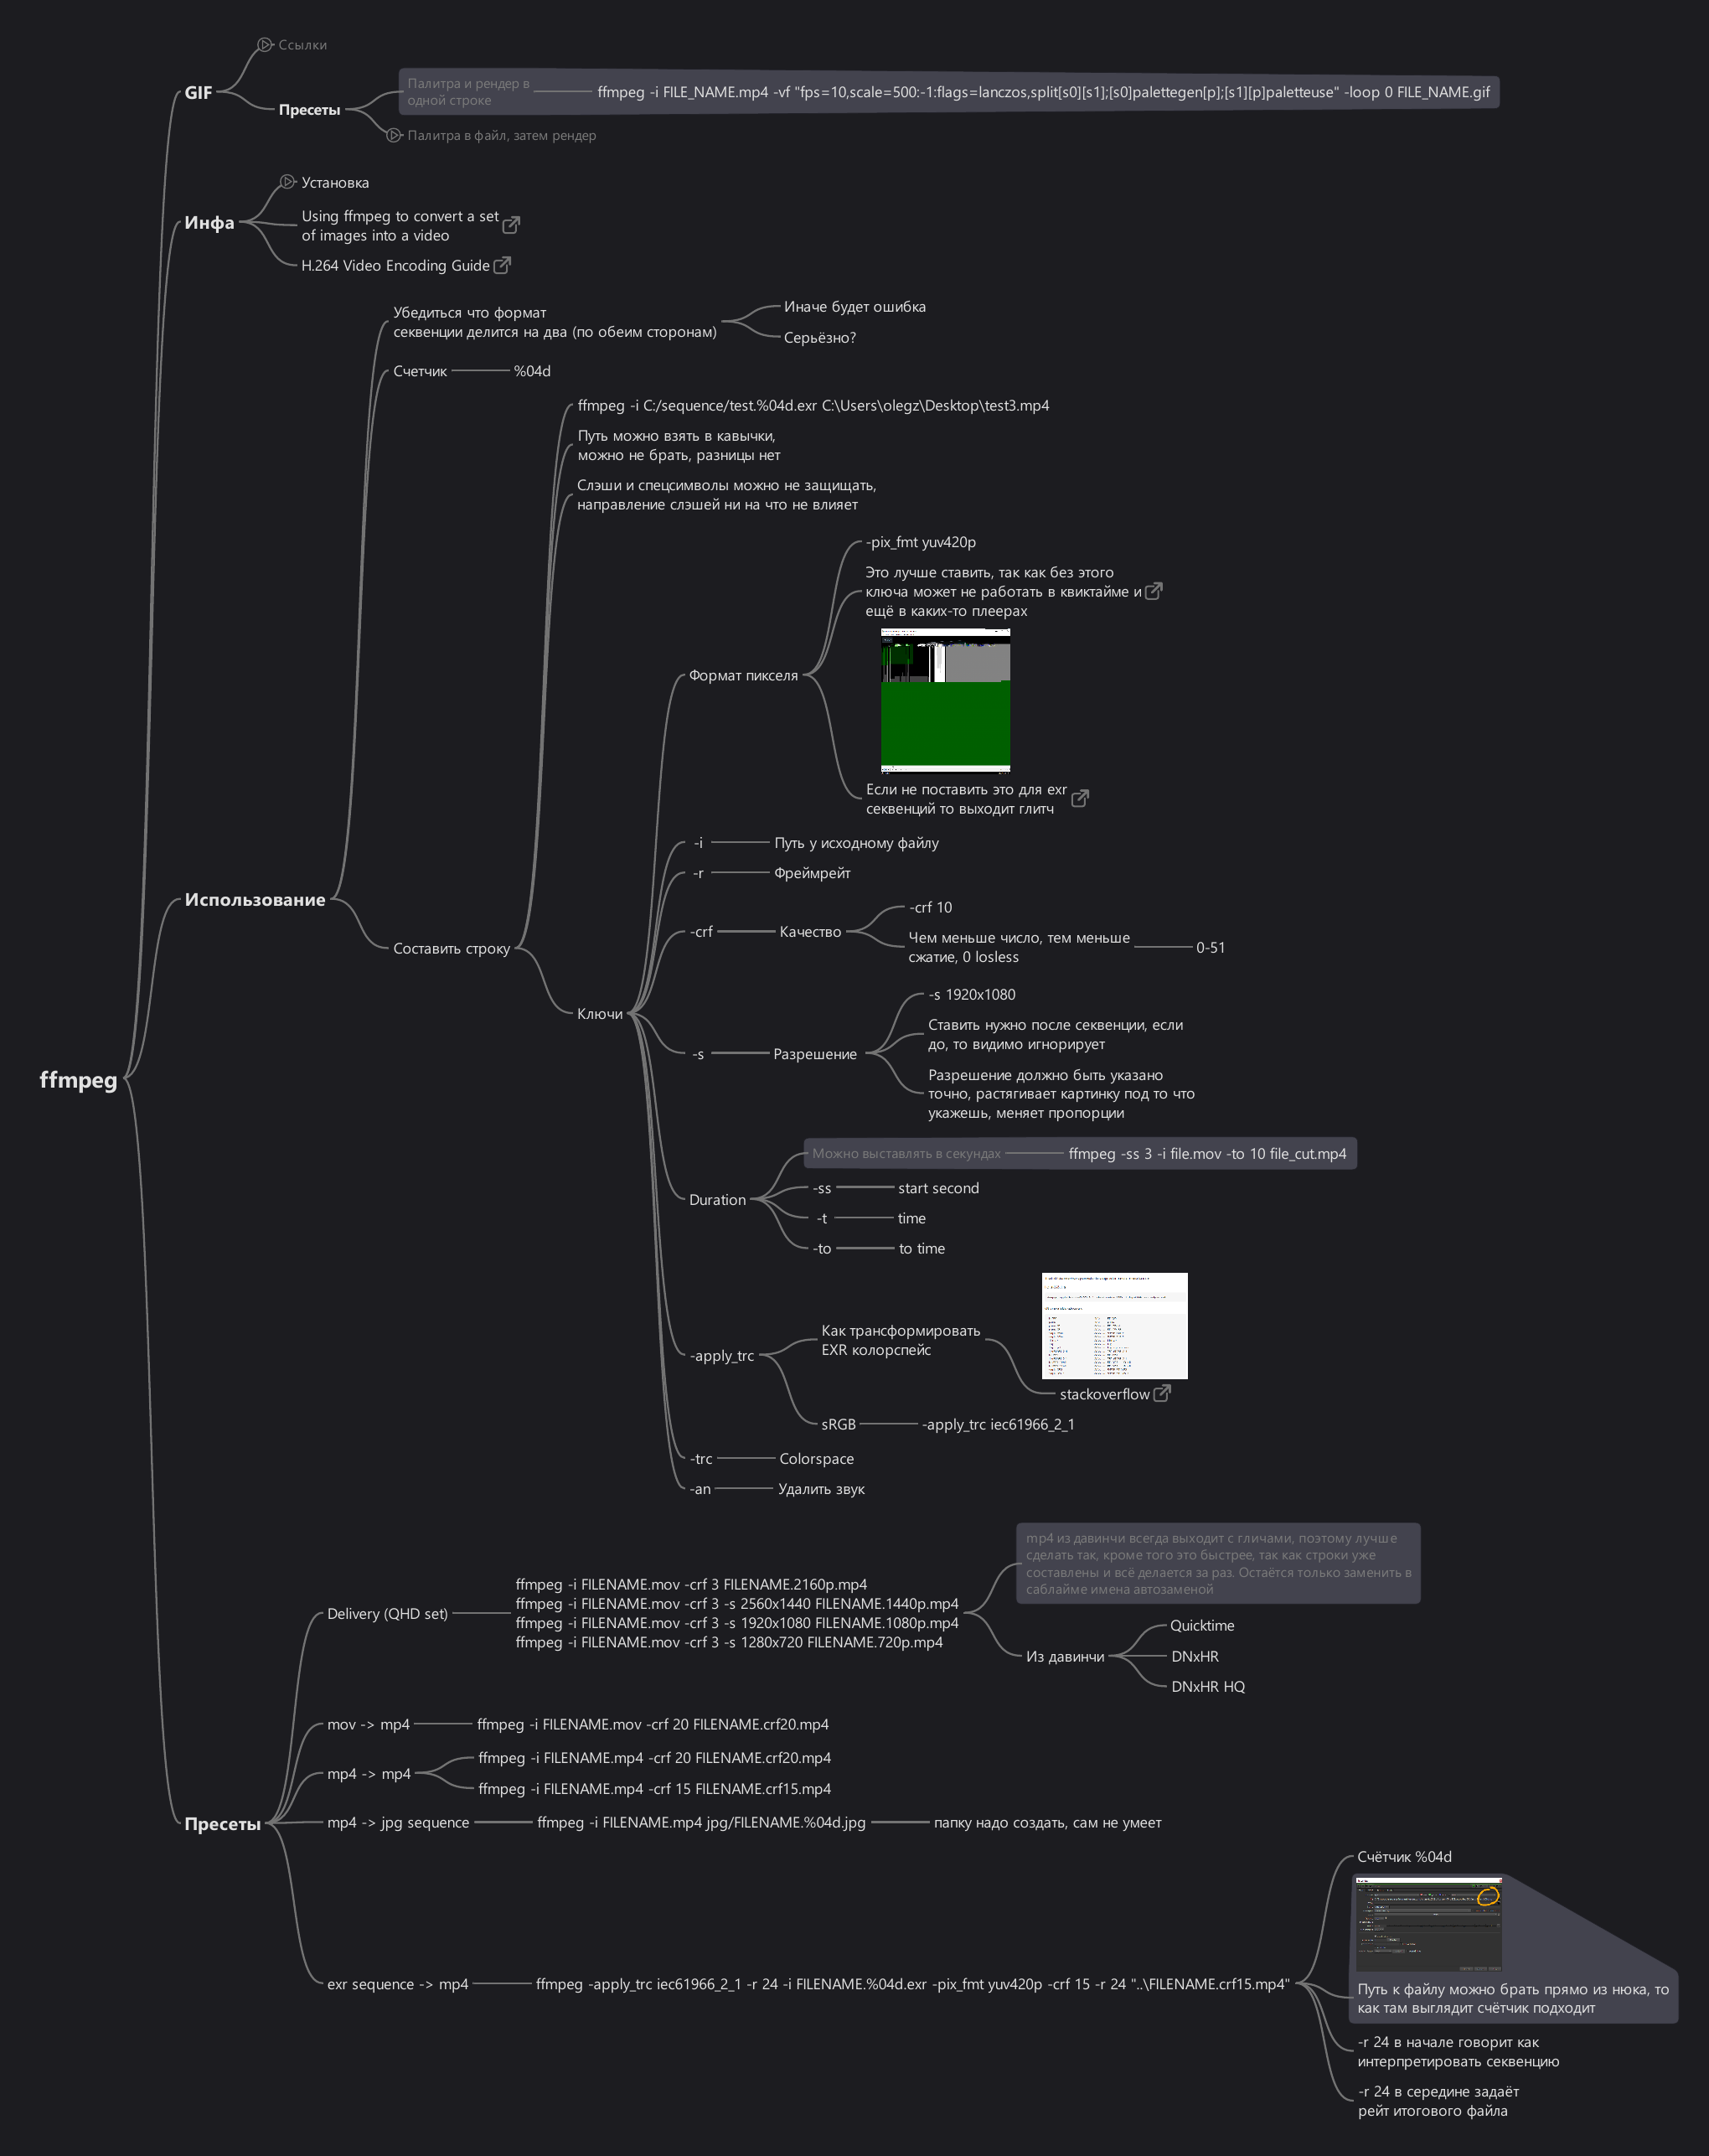
Store each proven command with:
- the problem it solves;
- a known-good input example;
- the expected output;
- the platform and shell;
- the FFmpeg version or last check date; and
- one note about the result or failure.
This turns a one-off command into a small production tool.
Fix common failures
«ffmpeg is not recognized»
Open a new terminal. For a manual install, make sure the PATH entry points to the folder that contains ffmpeg.exe.
«Unknown encoder» or «No such filter»
Builds include different external libraries. Run ffmpeg -encoders or ffmpeg -filters, then use an installed option or choose a build that includes the required library.
The output is stretched
A fixed width and height can change the aspect ratio. Use a scale expression such as scale=1920:-2 when FFmpeg should calculate one dimension.
A common player rejects the output
For a general H.264 MP4, use H.264 video, AAC audio, and yuv420p. Check the final platform requirements before delivery.